
If your LGMG T72J has started moving erratically, responding with a frustrating delay, or refuses to move, your joystick is the likely culprit. Before you accept a six-week wait and a hefty price tag for an OEM part, know there's a better way. A quality aftermarket joystick can solve the problem today and give you a more durable part.
The Quick Diagnosis
If your LGMG T72J's movements are jerky, delayed, or non-responsive, the internal potentiometers or gimbal mechanism in the factory joystick have likely worn out. This sends inconsistent voltage signals to the ECU, causing unpredictable operation. The fastest, most reliable fix is a complete replacement with a heavy-duty aftermarket joystick.
Symptoms & Identification
If the operator reports any of these issues, you're on the right track:
- Jerky or Uncontrolled Movements: The boom or drive lurches instead of moving smoothly, especially when feathering the controls. This points to dead spots in the potentiometer.
- Failure to Engage: You move the stick and nothing happens, or you have to jiggle it to find a "sweet spot." This indicates a break in the pot's resistive track.
- Intermittent Operation: The joystick works, then quits, then works again. This is often a sign of a thermal-related break in the internal circuits.
- Machine Creeping: The stick is centered, but the machine drifts. This means the gimbal is worn and can't return to a true zero-volt neutral position.
- Delayed Response: A noticeable lag between moving the joystick and the machine responding.
Tools Required
- Multimeter (non-negotiable for pinouts)
- Metric Allen Key Set
- Small Flathead Screwdriver
- Wire Strippers/Cutters
- Heat-Shrink Butt Connectors
- Depinning Tool (optional but recommended)
Safety Warning
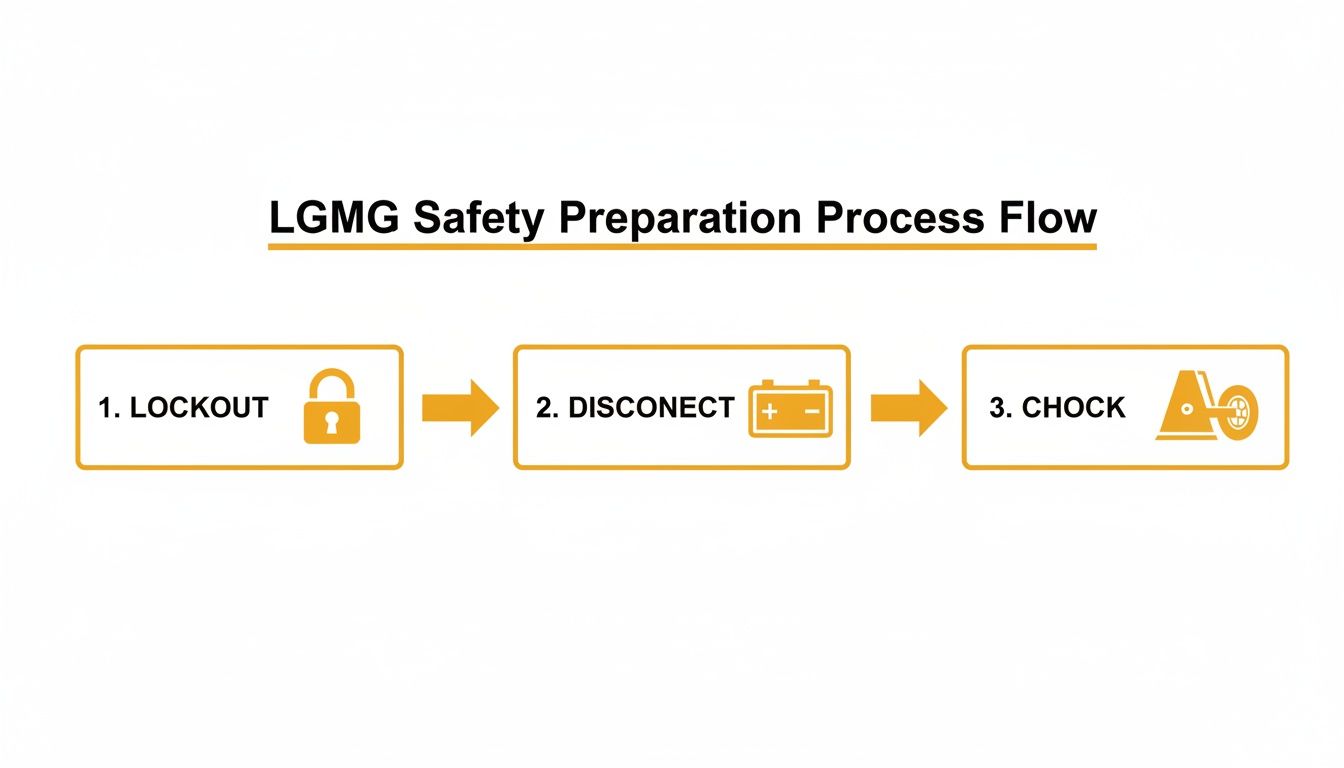
Disconnect the main negative battery terminal first. This kills any chance of an accidental short that could damage the ECU or cause injury. Chock the wheels and follow all lockout/tagout procedures before beginning work.
The Technical Guide (Step-by-Step)
This isn't a job you want to rush. A proper setup is the difference between a smooth, 30-minute swap and a multi-day headache.
1. Confirm the Part Number
Before you do anything else, open the upper control box to find the exact part number. Look for a small sticker on the plastic housing of the joystick base. It will look something like LGMG #1010XXXX. Snap a clear photo of this sticker with your phone. This is non-negotiable proof of the part you need. LGMG made changes between Gen 1 and Gen 2 models, and these joysticks are not interchangeable. The OEM part number is the only way to ensure you get a direct, plug-and-play fit. Note: Components may vary by Gen 1 vs Gen 2 series. Verify with your parts manual.
2. Prepare the Machine
Follow this protocol to the letter:
- Park on solid, level ground.
- Chock at least two wheels.
- Perform Lockout/Tagout: Kill power at the key switch and ground controls, then place your personal lock on the main power disconnect.
- Disconnect the battery, negative terminal first.
3. Remove the Old Joystick
- Document the wiring: Once the control box cover is off, take several clear photos of the existing wiring and connector. Show which wire goes to which pin. This is your blueprint.
- Unplug the connector: Gently press the locking tab with a small screwdriver to release the main connector.
- Unbolt the joystick: Remove the four mounting bolts and lift the old unit out. Clean the mounting surface before proceeding.
4. Mount the New Joystick and Map the Pinout
- Install the new joystick: Place the new unit in position. The bolt holes should line up perfectly. Start all four bolts by hand, then snug them down in a star pattern. Refer to your specific service manual for torque values—do not overtighten. Overtightening can crack the plastic housing.
- Connect the wires: This is where your photos and the new joystick's wiring diagram are critical. You will splice the new joystick's pigtail onto the machine's original connector.
- CRITICAL WARNING: Never assume wire colors will match. Always trust the wiring diagram that came with your new joystick.
- Use high-quality, heat-shrink butt connectors for a weatherproof seal. Match the function of each wire on the new joystick (Power, Ground, X-Axis, Y-Axis) to the correct pin on the OEM connector. Use your multimeter on the continuity setting to verify each connection.
5. Calibrate the New Joystick
A new joystick must be calibrated to teach the ECU its new voltage range.
- Enter Service Mode: Reconnect the battery (positive first, then negative) and power up the machine. Follow the procedure in your T72J service manual to enter the diagnostic menu.
- Run the Calibration Routine: Navigate to the joystick calibration section. The on-screen display will guide you. You will be prompted to leave the stick in neutral, then move it to its full-stroke limits (forward, back, left, right).
- Save and Exit: Once the routine is complete, save the new calibration and cycle the machine's power.

6. Perform a Full Function Test
In a safe, open area, verify true proportional control:
- Creep Speed Check: Push the joystick just off-center. The machine should move at a slow, controllable crawl. Test all directions.
- Feathering the Lift: Move the stick slightly to lift the boom. It should rise slowly and steadily. Test both lift and lower functions.
- Multi-Function Test: Drive forward slowly while steering slightly. The system should blend these functions smoothly.
- Emergency Stop Test: While driving, hit the E-stop. The machine must stop immediately.
- Auxiliary Function Check: Test the horn and any other buttons on the joystick.
The Part You Need
The traditional dealer parts channel means a 6-to-8 week lead time from an overseas factory. That's a month or more of downtime bleeding money while your LGMG T72J sits idle. The real cost of a failed joystick isn't the part itself—it's the lost revenue from that machine being down.
China Lift Supply stocks the specific, OEM-compatible joystick for your T72J in their US warehouse. When you order, the part ships the same day from Kansas, not from a factory across the ocean. This is a universal joystick, meaning it is engineered as a direct replacement for multiple brands, including LGMG, ensuring precise fit and function without the dealer delay. This is how you get your machine back on the job in days, not months.
For more in-depth solutions, you can check out our other LGMG troubleshooting guides or browse our full range of LGMG parts to see other compatible components.
Can't wait 6 weeks for this part? We have it on the shelf in Kansas. Check the price and availability here: [Link Placeholder].