If your LGMG lift is dead in the water and flashing a Code 05, the machine's brain (ECU) has lost its communication with the Battery Management System (BMS). The machine shuts down completely for safety. Before you start pulling wiring diagrams, the culprit is usually simple: a loose or corroded CAN bus connector.
The Quick Diagnosis
Code 05 means the ECU can't see the battery status, so it triggers a hard stop. The most common cause is a faulty BMS communication harness or a bad connection at either the battery tray or the ground controller. You're hunting for a physical connection problem, not a fried computer.
Symptoms & Identification
Confirm you're on the right track by matching these operator-level symptoms:
- "Code 05" on Display: The diagnostic screen clearly shows the fault code, often with a padlock icon.
- Total Function Lockout: No response from the joystick or switches. The lift will not drive or lift.
- Intermittent Operation Before Failure: The machine may have hesitated or briefly cut out in the hours leading up to the hard fault, especially after hitting a bump.
Tools Required
- Quality Digital Multimeter
- 10mm and 13mm Sockets
- Electrical Contact Cleaner
- Small Pick Set or Terminal Tools
- Zip Ties
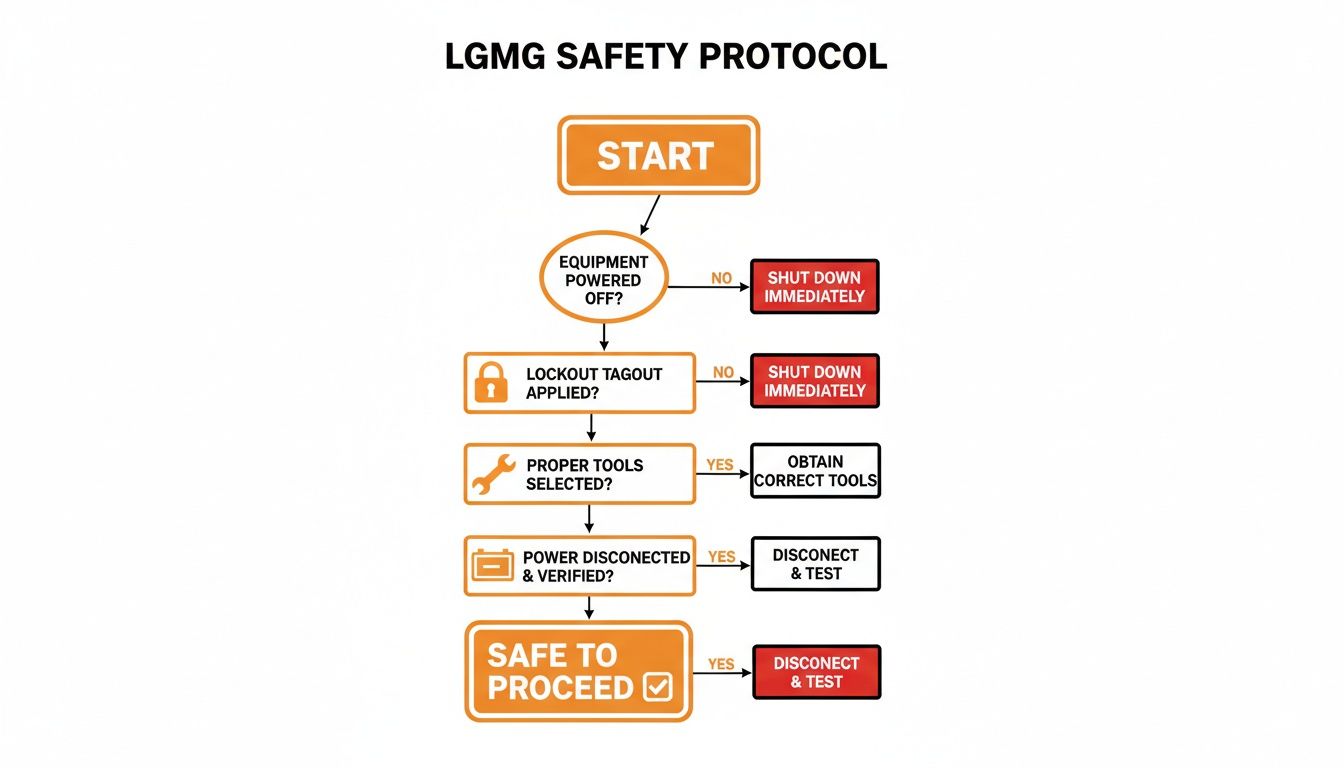
Safety Warning
High-voltage DC systems are not a joke. An accidental arc can weld tools and cause severe injury. Perform a full Lockout/Tagout (LOTO) procedure before starting. Disconnect the main negative battery terminal first to de-energize the chassis.
The Technical Guide to Fixing Code 05
We're going to follow a logical path from the simplest fix to the more involved tests. Be systematic.
1. The Initial Visual Inspection Before grabbing a meter, use a flashlight. More than half of these faults are found by eye.
- Check the Ground Controller Box: Open the panel and locate the CAN bus harness plugged into the ECU. It's usually a twisted pair of smaller gauge wires (often yellow and green). Look for rubbing, chafing, or signs of moisture. Gently tug on the connector to ensure it's seated firmly.
- Check the Battery Tray: Trace that same harness to where it plugs into the BMS. This connection sees more abuse. Look for pushed-out pins, physical damage, or the green crust of corrosion.
2. Putting The Multimeter To Work If the visual inspection is clear, it's time to test the CAN bus circuit's integrity. Ensure the machine is powered down and the battery is disconnected for this test.
-
Check CAN Bus Resistance: The CAN network is terminated with two 120-ohm resistors. Measured together, they should read about 60 ohms.
- Set your multimeter to Ohms (Ω).
- Unplug the main CAN connector at the ECU.
- Place your probes on the pins for CAN High and CAN Low.
- You must see a reading of approximately 60 ohms.
- A reading of 120 ohms means you have an open circuit (broken wire or bad terminator). A reading near 0 ohms means a short circuit between the two wires.
-
Check CAN Bus Voltages: If resistance is good, the wiring is likely intact. Now we check for active communication. Reconnect the battery and power up the machine for this test. Be careful not to short your probes.
- Set your multimeter to DC Volts (V).
- Back-probe the same CAN connector while it's plugged in.
- Place your black probe on a good chassis ground.
- Your red probe on the CAN High pin should read ~2.5V to 3.5V.
- Your red probe on the CAN Low pin should read ~1.5V to 2.5V.
- If you see 0V on both, nothing is communicating. If you see battery voltage, you have a short to power.
3. Repairing The Fault Once your tests point to the problem, the fix is direct.
- For Loose/Corroded Connectors: Unplug and spray with electrical contact cleaner. Use a small brush to remove residue, let it dry, apply dielectric grease to the seal, and plug it in firmly until it clicks.
- For a Damaged Harness: If you found a chafed or broken wire, replace the entire harness. Splicing CAN bus wires is a bad idea and will cause future problems. A new harness is the only reliable, long-term fix.
- For Incorrect Resistance/Voltage: If your resistance was 120 ohms or voltages are wrong, it points to an internal failure in either the ECU or the BMS (less common). This requires component replacement.
The Part You Need
If your diagnostics point to a bad wire, the problem is the BMS communication harness. Don't waste time trying to patch it; vibration and moisture will just cause the repair to fail. The villain is downtime, and calling the dealer means a 6-8 week lead time from China.
China Lift Supply stocks the OEM-compatible LGMG BMS communication harness in the US to avoid that delay.
- Note: Components may vary by Gen 1 vs Gen 2 series. Verify with your parts manual. Common part numbers include E0101-01034 for the S1932E and E0101-01055 for the AS0607E.
Verifying The Repair
The job isn't done until you've proven the fix.
- Reconnect the battery (positive first, then negative). Refer to your specific service manual for torque values—do not overtighten.
- Power up the machine at the ground controls. The Code 05 should be cleared.
- Cycle all functions from the ground, then switch to the platform and test all drive and lift functions. This confirms the connection is stable under electrical load.
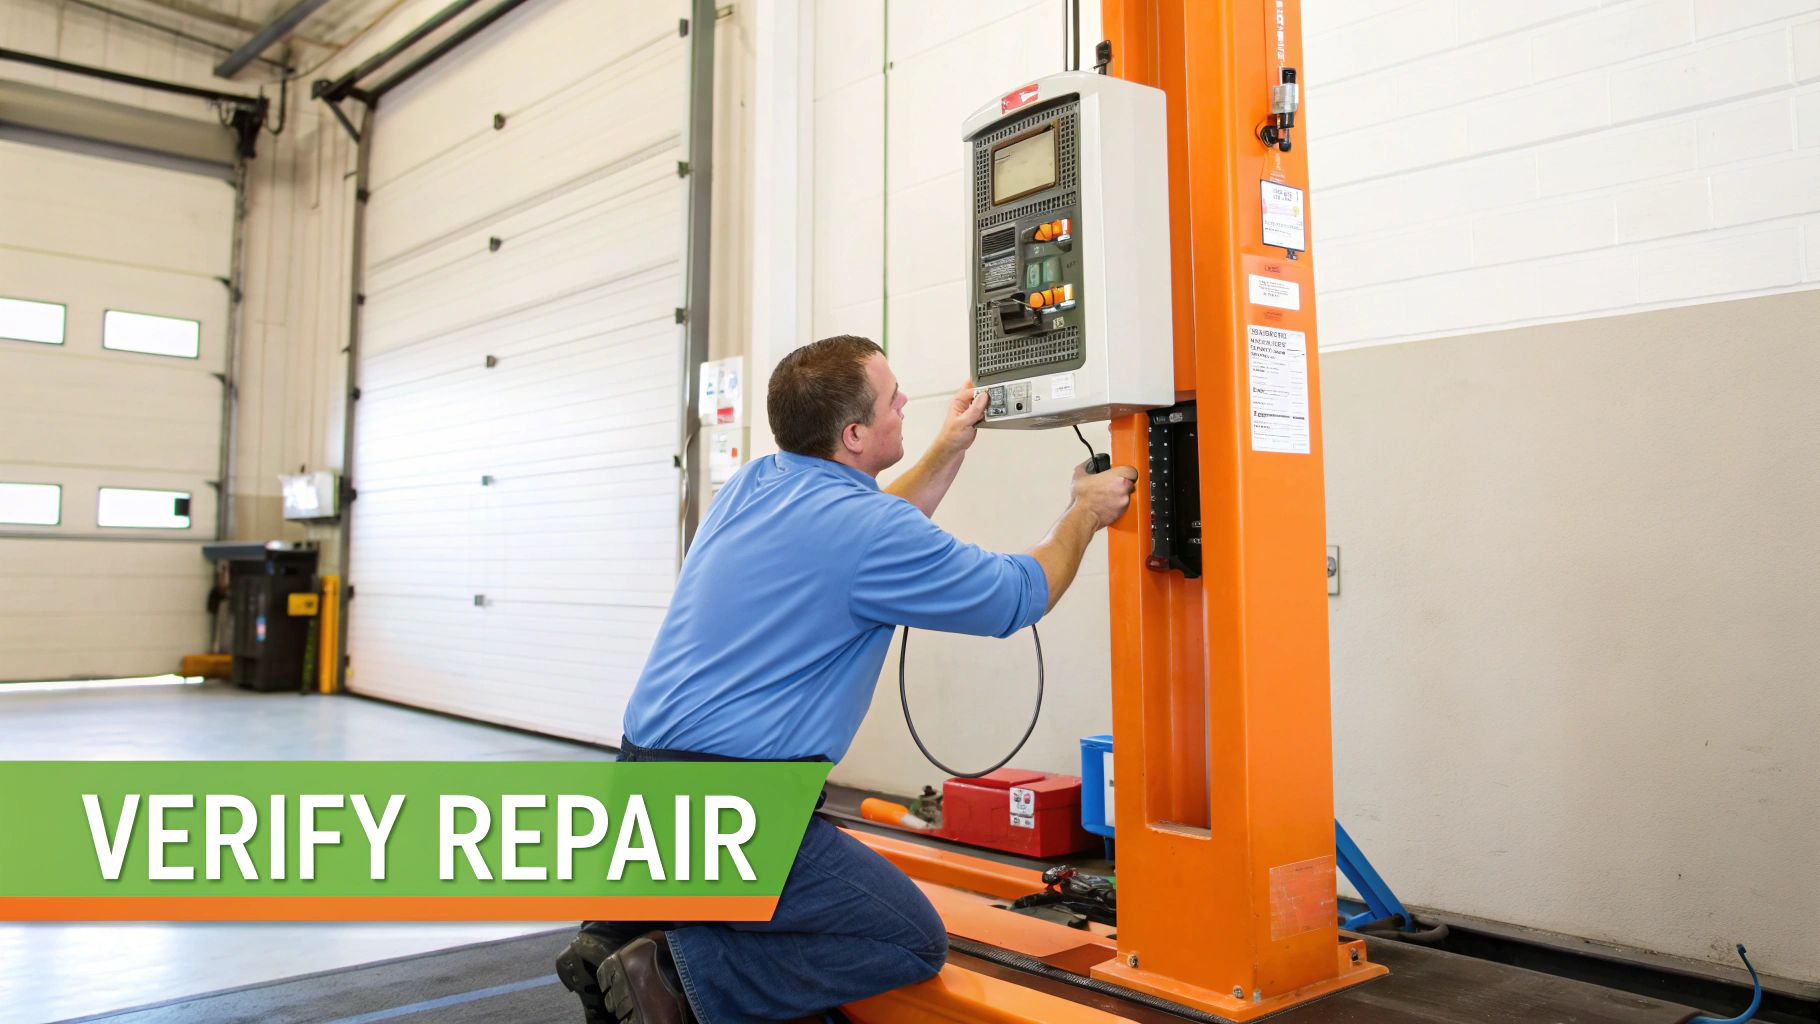
To prevent a repeat failure, use zip ties to secure the new harness away from sharp edges and apply dielectric grease to the connector seals during your next PM.
Frequently Asked Questions About Code 05
Can a low battery cause a Code 05? No. Code 05 is strictly a communication fault. The ECU has lost the signal from the BMS; it is not a low voltage alarm.
Is it safe to bypass the BMS to move the machine? Absolutely not. Never attempt to bypass the BMS. It is the primary safety system preventing catastrophic battery failure, thermal runaway, and fire. Bypassing it is incredibly dangerous.
Will a firmware update fix a Code 05? Highly unlikely. This is a hardware problem (wiring, connectors) over 99% of the time. Don't waste time on software unless a specific service bulletin directs you to.
Can't wait 6 weeks for this part? We have it on the shelf in Kansas. Check the price and availability here: https://www.chinaliftsupply.com.