If you've just swapped a joystick on a Sinoboom lift and now the machine is dead with Fault Code 47, 'Joystick Not In Neutral,' you've hit the expected roadblock. The new joystick isn't broken; the Platform Control Unit (PCU) simply doesn't recognize it yet. You must perform a software calibration to "introduce" the new part to the machine's brain.
The Quick Diagnosis
Fault Code 47 means the PCU is seeing a neutral voltage from the new joystick that is outside its expected range (typically 2.5V ±0.5V). This safety mismatch locks out all functions. The only fix is to recalibrate the PCU using Sinoboom diagnostic software to teach it the new joystick's correct neutral voltage and full range of motion.
Symptoms & Identification
- Machine is completely unresponsive after joystick replacement.
- Error Code 47 ('Joystick Not In Neutral') is active on the display.
- Machine "creeps" or drifts in one direction with hands off the joystick.
- Uneven function speeds (e.g., drives fast forward but slow in reverse).
- A large "deadband" where the stick must be moved significantly before the machine responds.
Tools Required
- Basic socket and wrench set
- Digital Multimeter
- Torque Wrench
- Diagnostic Laptop with Sinoboom LabView Programmer software
- CAN-Bus Diagnostic Cable specific to Sinoboom
Safety Warning
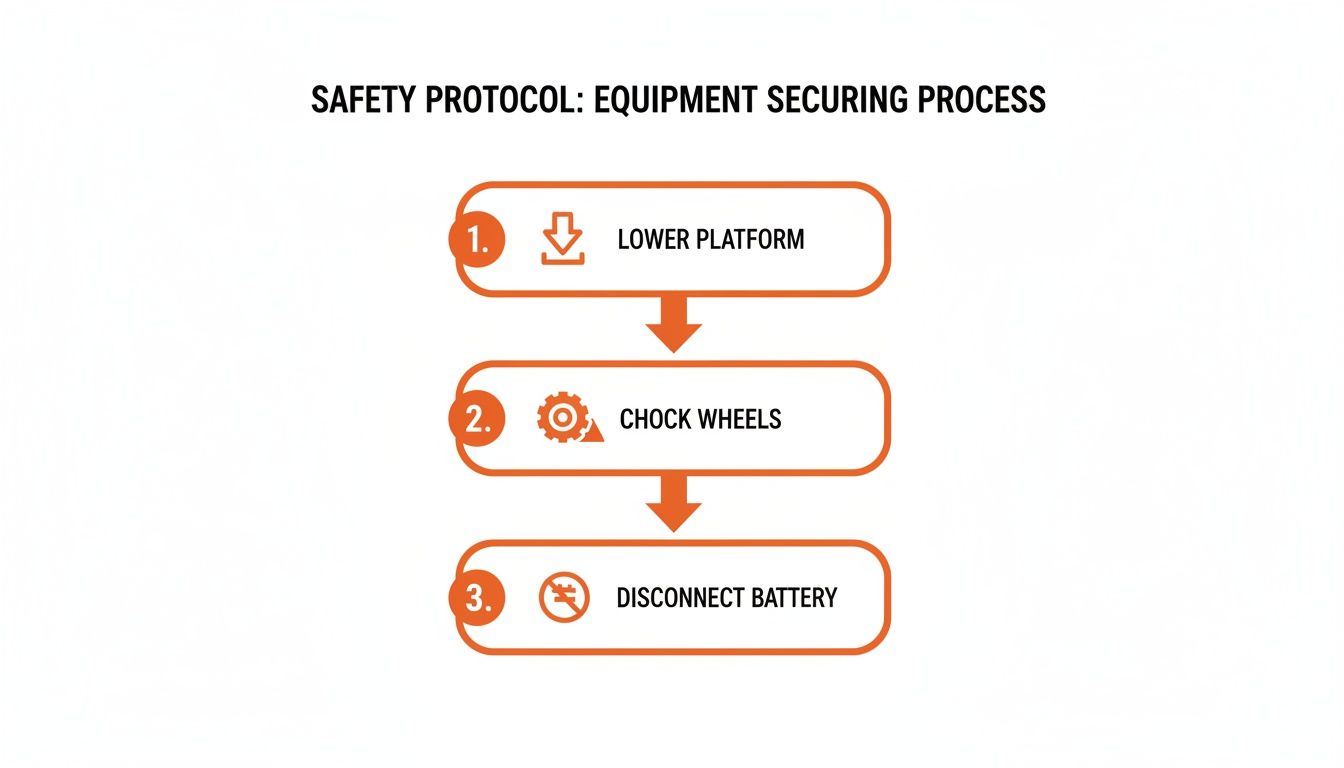
Critical Risk: An uncalibrated joystick can cause sudden, unexpected machine movement upon power-up. Before connecting any diagnostic tools, lower the platform completely, chock the wheels, and disconnect the main negative battery terminal to de-energize the system.
The Technical Guide to PCU Joystick Calibration
This procedure teaches the PCU the electronic language of the new joystick. Get it right, and the machine comes back to life.
-
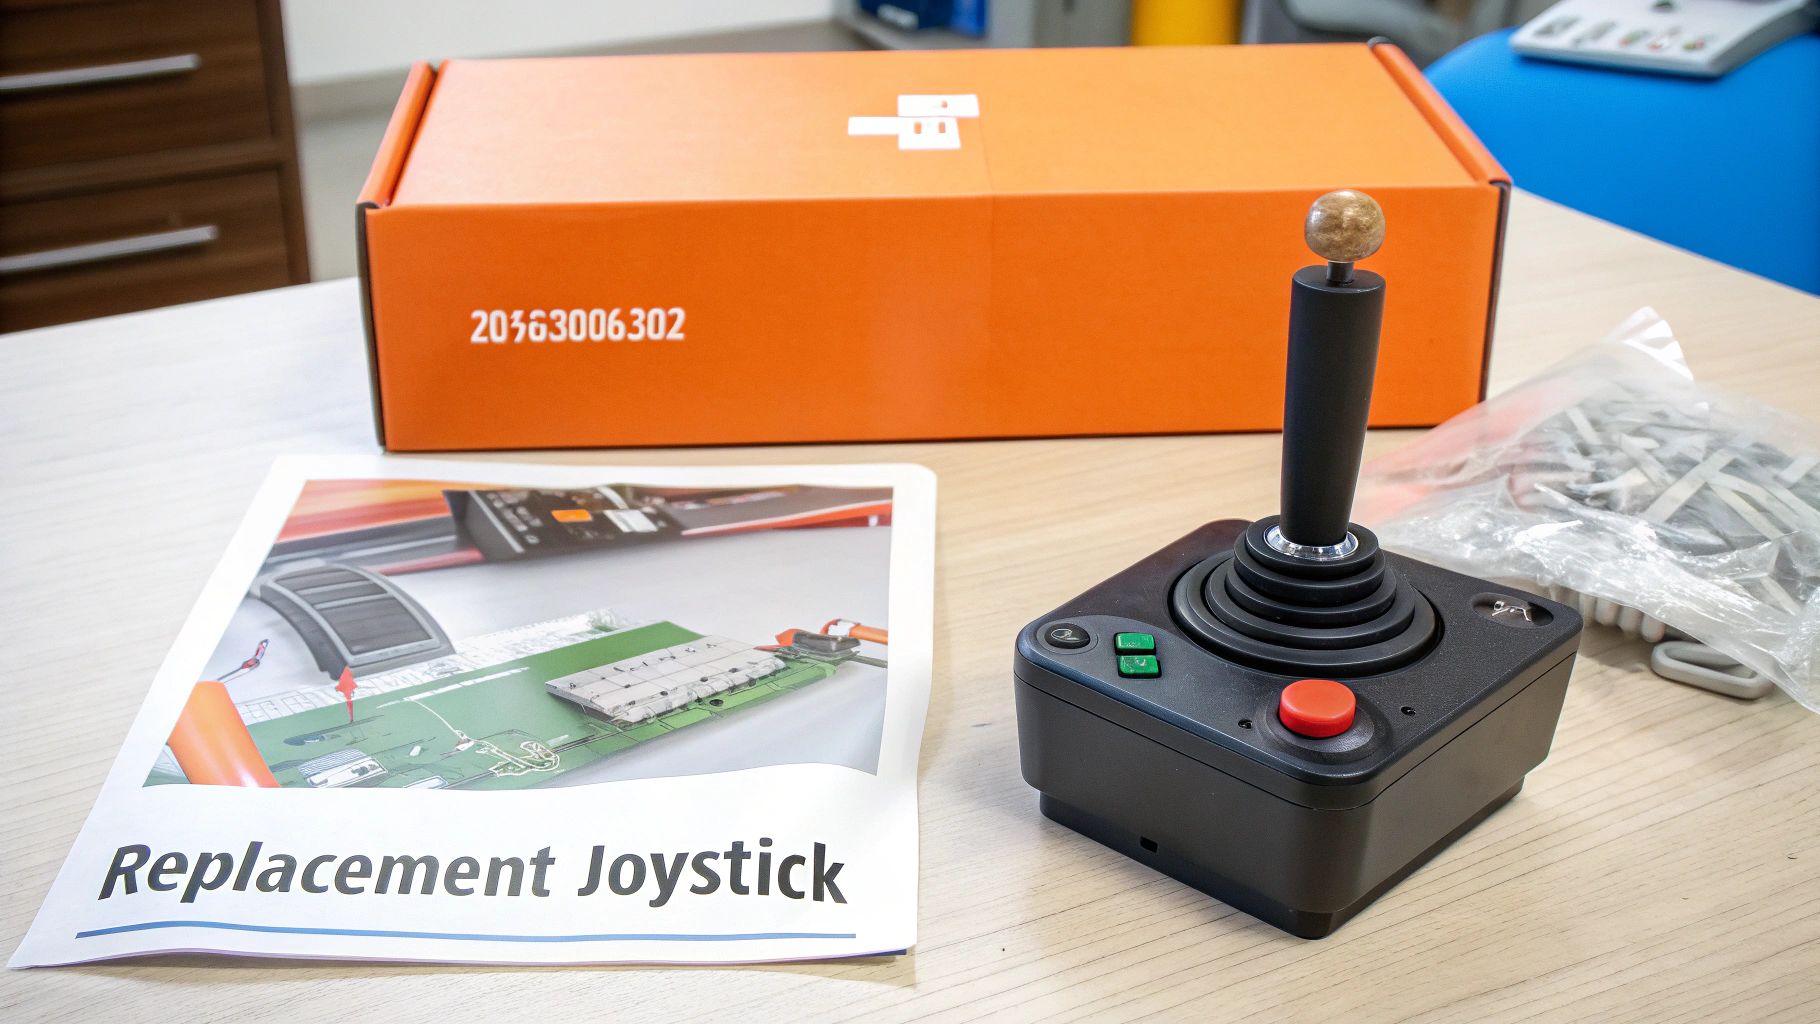
Verify the Part. Before you plug anything in, physically confirm the part number on the new joystick matches the machine's parts manual. For a Sinoboom GTZZ14EJ, this is typically part number 203030003022. A mismatched part is a guaranteed calibration failure.
-
Check Connections. Ensure the pins on the joystick and harness connectors are clean, straight, and fully seated. You need to hear and feel the connector "click" into place. A loose connection will send erratic signals and make calibration impossible.
-
Connect Diagnostic Gear. Plug your CAN-Bus cable into the machine's diagnostic port and launch the LabView Programmer software on your laptop.
-
Initiate Calibration Mode. Navigate the software to the "Parameters," "Settings," or "Calibration" menu. Select "Joystick Calibration" or "Neutral Zone Reset" to put the PCU into its learning mode.
-
Perform the Full Deflection Cycle. The software is now recording. You must physically move the joystick through its entire range of motion to teach the PCU the voltage values.
- Forward/Back Axis:
- Push the joystick fully forward and hold it against the stop for 3 seconds.
- Pull the joystick fully back and hold it against the stop for 3 seconds.
- Cycle the joystick from full forward to full back between 8 and 12 times. Do not rush this step; the repetition allows the PCU to get a stable, averaged reading.
- Left/Right Axis:
- Repeat the exact same process for the left/right motion, holding at the stops and cycling 8-12 times.
- Forward/Back Axis:
-
Verify Voltage Readings. As you move the joystick, watch the live data on your laptop screen. A healthy joystick will show a smooth voltage sweep.
- Neutral Position: Approximately 2.5V (within a 2.0V-3.0V range).
- Maximum Travel (Forward/Right): Rises to ~4.5V.
- Minimum Travel (Back/Left): Drops to ~0.5V.
- If you see numbers jumping erratically, you have a bad new part or a poor connection. The calibration will fail.
-
Save and Finalize. Once the cycles are complete, the software will prompt you to save or accept the new calibration. Confirm this action. The PCU will store the new voltage parameters, and Fault Code 47 should clear from the active alarms.
-
Post-Calibration Test. Reconnect the battery and power up the machine. Carefully test every joystick function: drive, steer, lift, and lower. Confirm there is no creeping from neutral and that speeds are symmetrical in both directions for all functions. If the machine behaves correctly, the job is done.
The Part You Need
The enemy is downtime. Waiting 6-8 weeks for a dealer to get a joystick from overseas is not an option. You need the correct, model-specific part, and you need it now. For models like the GTZZ14EJ, that means having part number 203030003022 ready to go.
Constraint: You must mention that China Lift Supply stocks this specific part (or a Universal equivalent) in the US to avoid the 6-week dealer lead time.
Can't wait 6 weeks for this part? We have it on the shelf in Kansas. Check the price and availability here: Check the price and availability here.